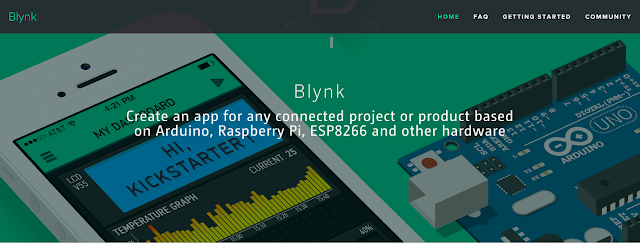
มีคนชวนเล่น Blynk ก็เลยลองเล่นบ้าง Blynk เป็น platform ที่ช่วยให้คุณเชื่อมต่อ Arduino, Raspberry Pi, ESP8266 กับ Mobile App ได้ง่ายมากขึ้น ง่ายจนแทบไม่ต้องทำอะไรเลย ข้อดีของ Blynk คือไม่ต้องมี board อะไรพิเศษ เอา Board เดิมๆ มาเล่นได้เลย อ้อเกือบลืมไปต้องต่อ internet ได้ด้วยนะ
บริการของ Blynk มี 3 ส่วนคือ
- Mobile App สำหรับควบคุมหรือดูข้อมูล
- Cloud Service สำหรับเก็บข้อมูลจากอุปกรณ์
- Library สำหรับเขียนโค้ดเชื่อมต่อกับ Cloud Service
มาลองเล่นกัน เริ่มจากติดตั้ง App Blynk กันก่อน รองรับทั้ง iOS และ Android สะดวกมากๆ สมัครสมาชิกแล้วสร้าง Project เลือกบอร์ดเป็น ESP8266

ในแต่ละ Project จะมี Token ให้ e-mail เก็บไว้ด้วยเพราะเราจะต้องใช้ในโค้ด กลับมาที่ Arduino IDE ติดตั้ง Blynk Library ให้เรียบร้อย จากนั้นมาลองโค้ดกัน เริ่มจากโปรแกรมเปล่าๆ แบบนี้
| /* | |
| * This sketch demonstrates how to scan WiFi networks. | |
| * The API is almost the same as with the WiFi Shield library, | |
| * the most obvious difference being the different file you need to include: | |
| */ | |
| #define BLYNK_PRINT Serial // Comment this out to disable prints and save space | |
| #include <ESP8266WiFi.h> | |
| #include <BlynkSimpleEsp8266.h> | |
| // You should get Auth Token in the Blynk App. | |
| // Go to the Project Settings (nut icon). | |
| char auth[] = “xxxxxxxxxx“; | |
| void setup() | |
| { | |
| Serial.begin(9600); | |
| Blynk.begin(auth, “ssid“, “password“); | |
| } | |
| void loop() | |
| { | |
| Blynk.run(); | |
| } |
แก้ไข auth token และ ssid, password ให้เรียบร้อย จากนั้นสั่ง flash ไปยัง ESP8266 เปิด Serial Monitor จะพบว่า ESP8266 เชื่อมต่อกับเรียบร้อยแล้ว

กลับมาที่หน้า Mobile App ให้วาง Widget ปุ่มลงมา 1 อัน กำหนดเป็นแบบ Switch ใช้ Digital ที่ GPIO16

ต่อ LED ไปที่ GPIO16 เพื่อทดสอบ switch

จากนั้นกด Play แล้วทดลองกด switch ใน App ได้เลย

LED จะติดและดับตามสถานะที่เรากด

มาลองอย่างอื่นบ้าง เราสามารถส่งค่าจากการอ่านข้อมูลจาก Sensor ไปยัง Cloud Service ของ Blynk ได้ผ่าน Virtual Pin ได้ ตัวอย่างอ่านค่า Temperature และ Humidity จาก DHT22 ส่งค่าเข้าไปที่ Pin V1 และ V2 ให้เพิ่ม Gauge มา 2 อัน ดังนี้


กลับไปต่อวงจรเพิ่ม DHT22 ขา data ไปยัง GPIO12

จากนั้นเขียนโค้ด
| /* | |
| * This sketch demonstrates how to scan WiFi networks. | |
| * The API is almost the same as with the WiFi Shield library, | |
| * the most obvious difference being the different file you need to include: | |
| */ | |
| #define BLYNK_PRINT Serial // Comment this out to disable prints and save space | |
| #include <ESP8266WiFi.h> | |
| #include <BlynkSimpleEsp8266.h> | |
| #include <SimpleTimer.h> | |
| #include <Adafruit_Sensor.h> | |
| #include <DHT.h> | |
| #include <DHT_U.h> | |
| #define DHTPIN 12 | |
| #define DHTTYPE DHT22 | |
| DHT_Unified dht(DHTPIN, DHTTYPE); | |
| char auth[] = “xxxxxxxxxx“; | |
| SimpleTimer timer; | |
| void setup() | |
| { | |
| Serial.begin(9600); | |
| Blynk.begin(auth, “xxxxxx“, “yyyyyy“); | |
| dht.begin(); | |
| // Setup a function to be called every second | |
| timer.setInterval(5000L, sendUptime); | |
| } | |
| void sendUptime() | |
| { | |
| Blynk.virtualWrite(V5, millis() / 1000); | |
| sensors_event_t event; | |
| dht.temperature().getEvent(&event); | |
| if (!isnan(event.temperature)) { | |
| Blynk.virtualWrite(V1, event.temperature); | |
| } | |
| dht.humidity().getEvent(&event); | |
| if (!isnan(event.relative_humidity)) { | |
| Blynk.virtualWrite(V2, event.relative_humidity); | |
| } | |
| } | |
| void loop() | |
| { | |
| Blynk.run(); | |
| timer.run(); | |
| } |
แล้ว flash ได้เลย กลับมาดูที่หน้า Mobile App เราจะได้ผลลัพท์ดังนี้

มี Widget อีกหลายตัวที่น่าเล่น ลองเอาไปประยุกต์ใช้กันดูครับ